How to create several WorPress installations for Synology’s Web Station
1. Install the following Synology packages
MariaDB 10
Choose a password for your database (username is always root).
phpMyAdmin
PHP 8.0
Apache HTTP 2.4
Text Editor
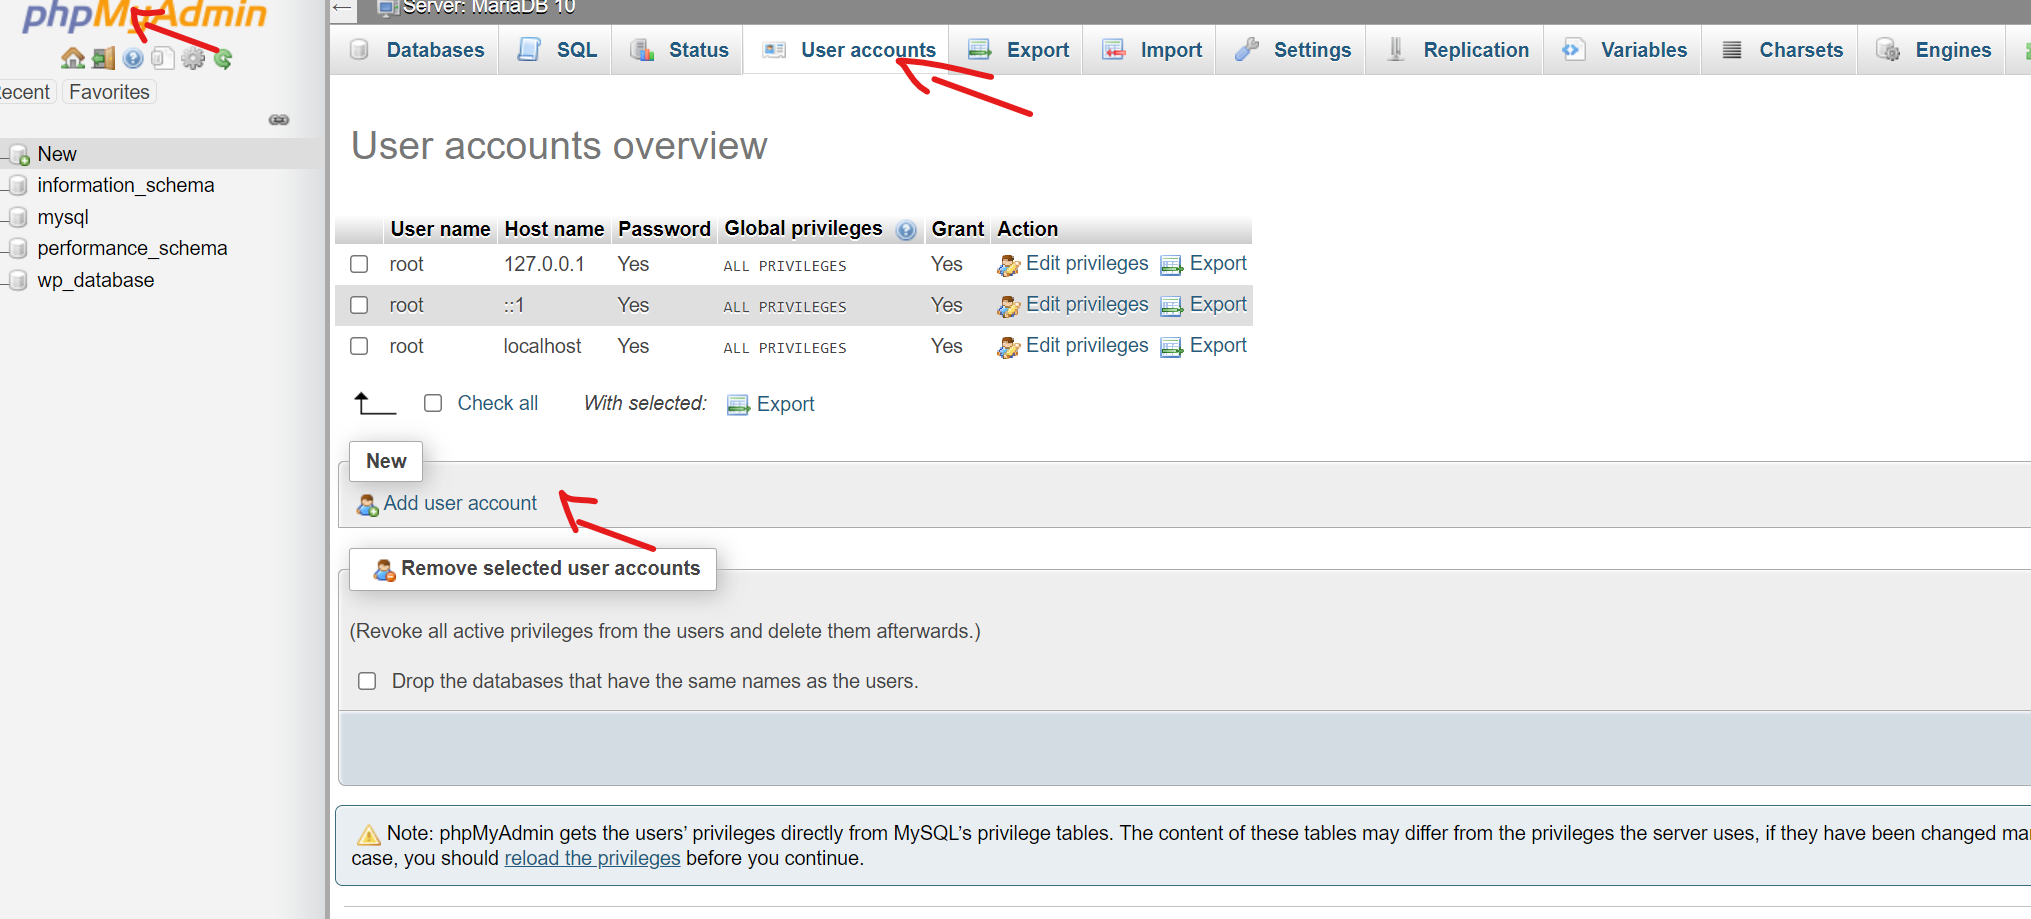
2. Log into phpMyAdmin and create database for WordPress
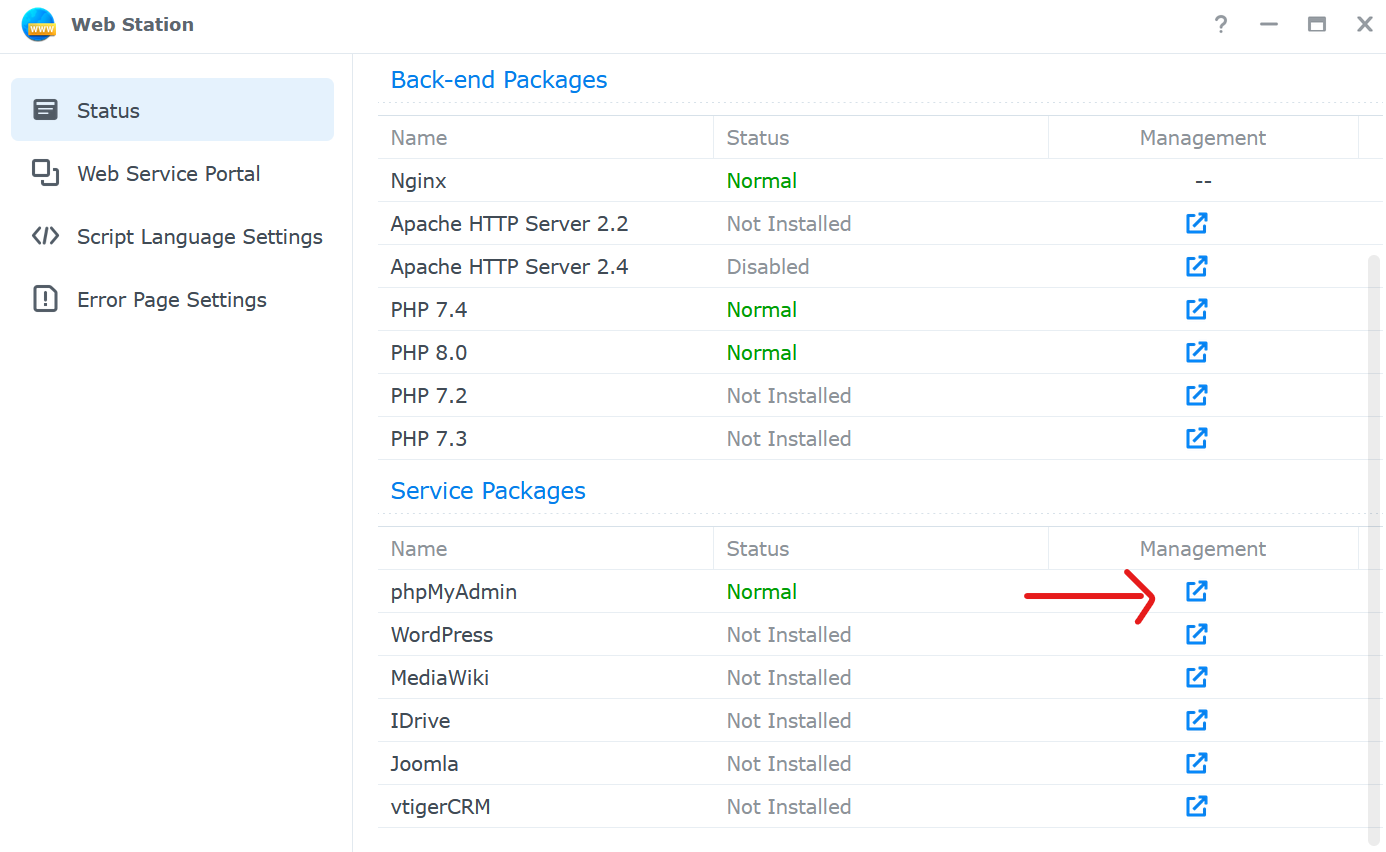
Open the Web Station Package and click the link to open phpMyAdmin
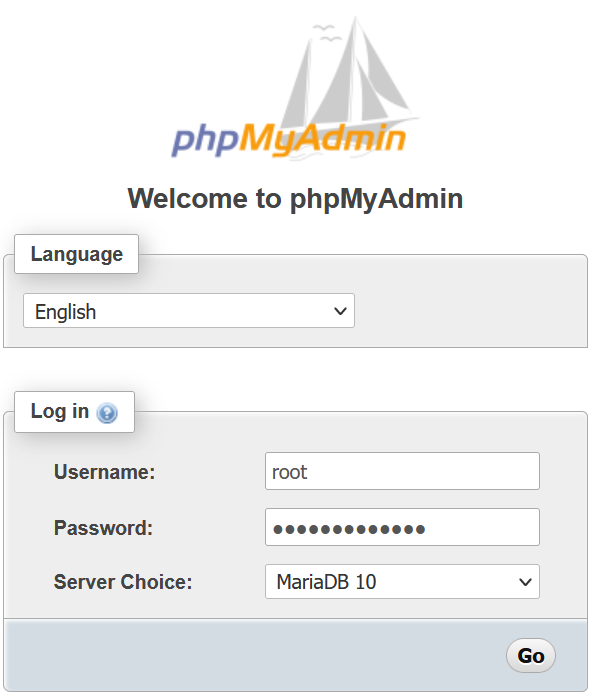
Log into phpMyAdmin
username: root
password: your choosen MariaDB 10 password
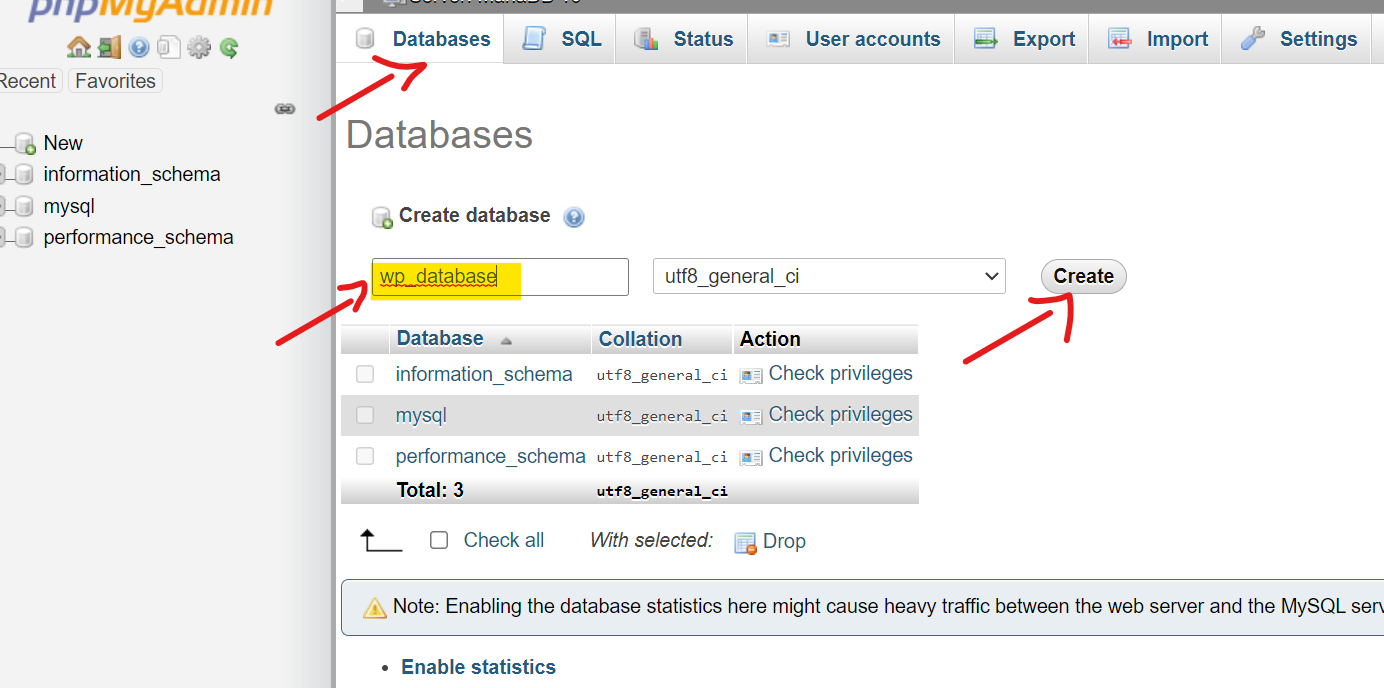
Create a new database with the name “wp_database”
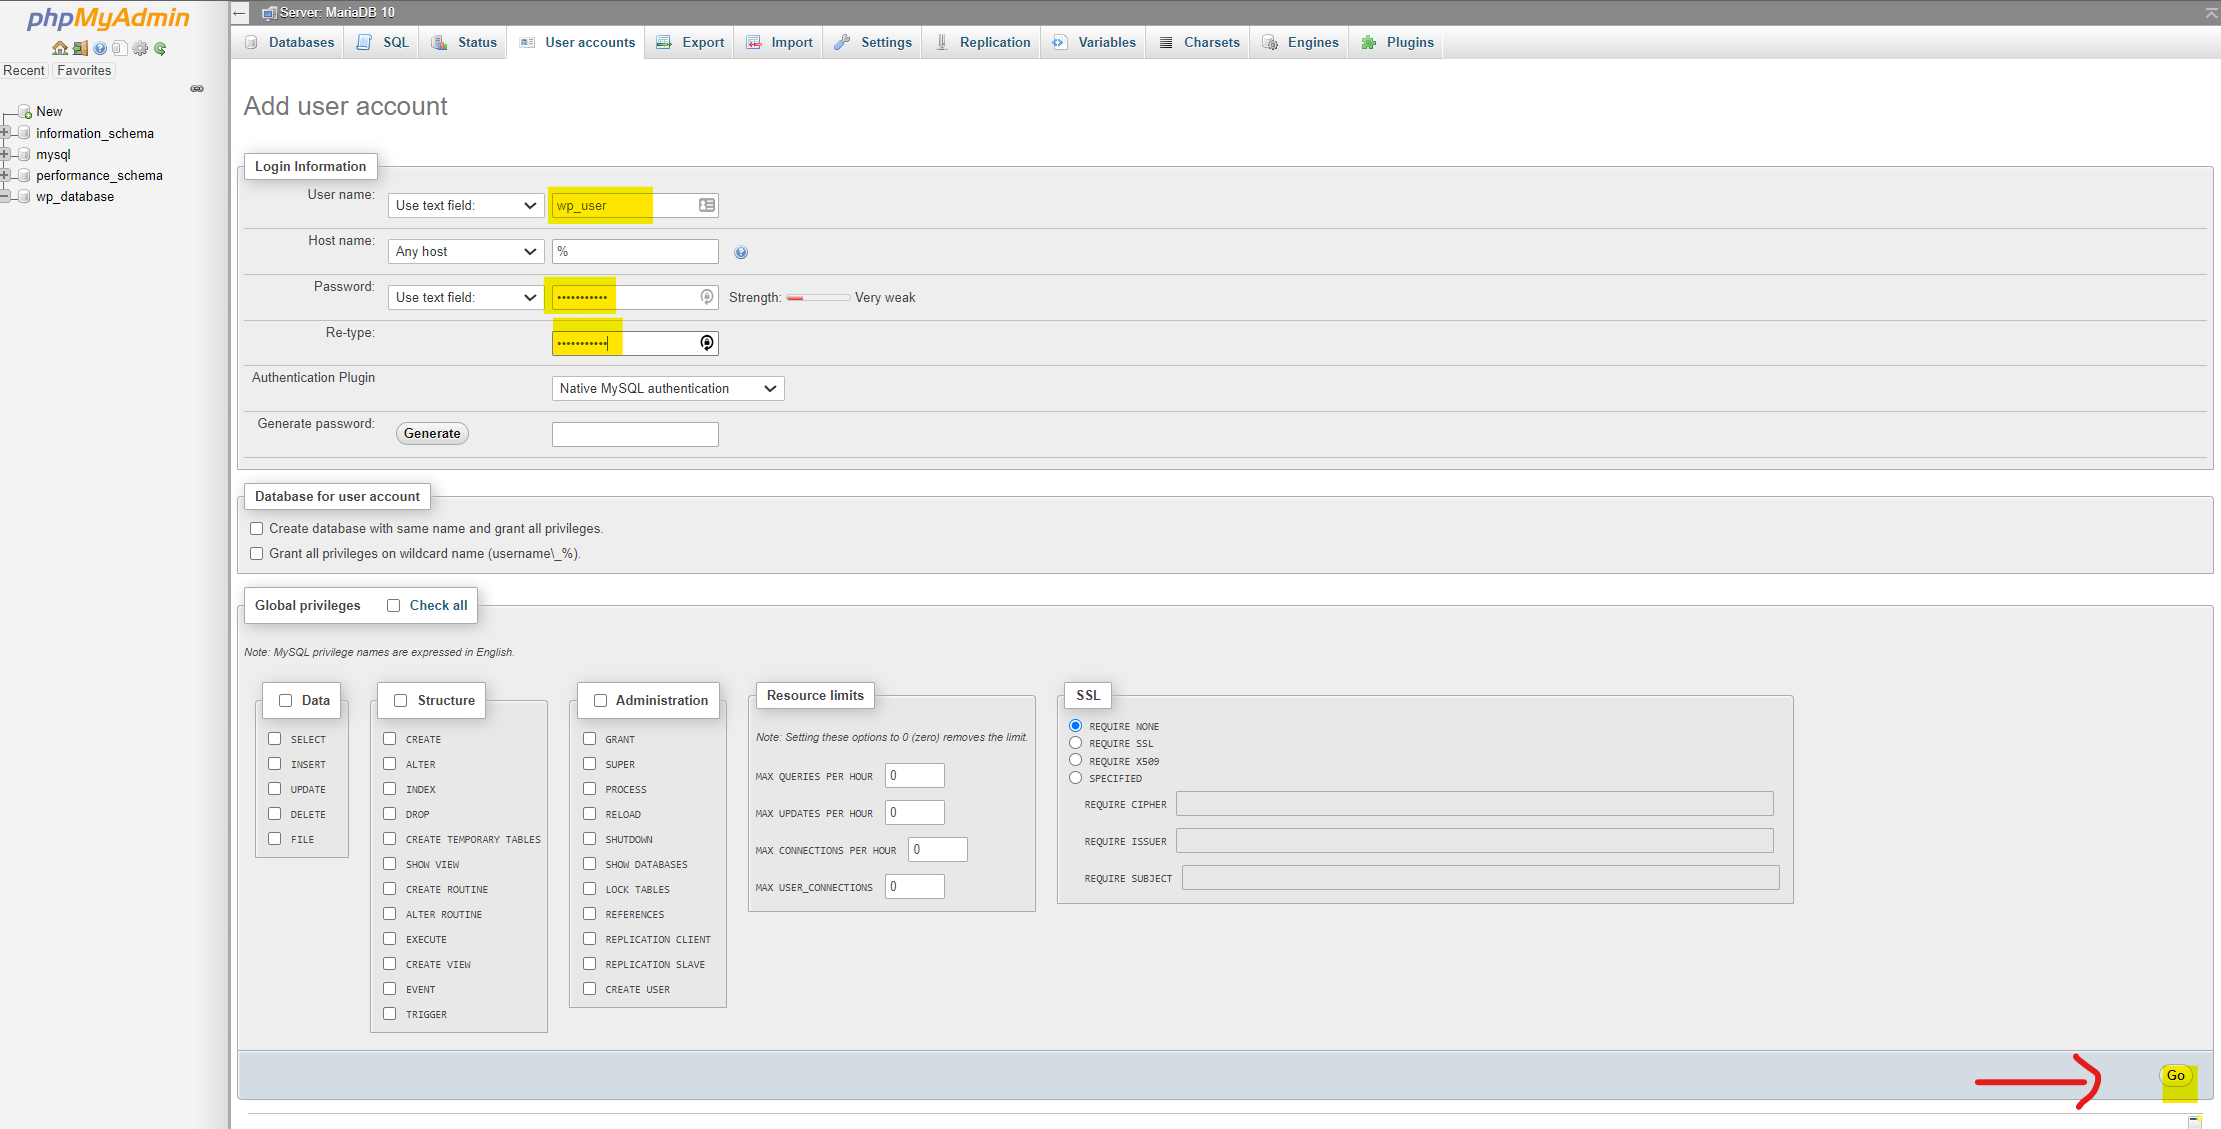
Add a new user account
Choose the name “wp_user” and a secure password
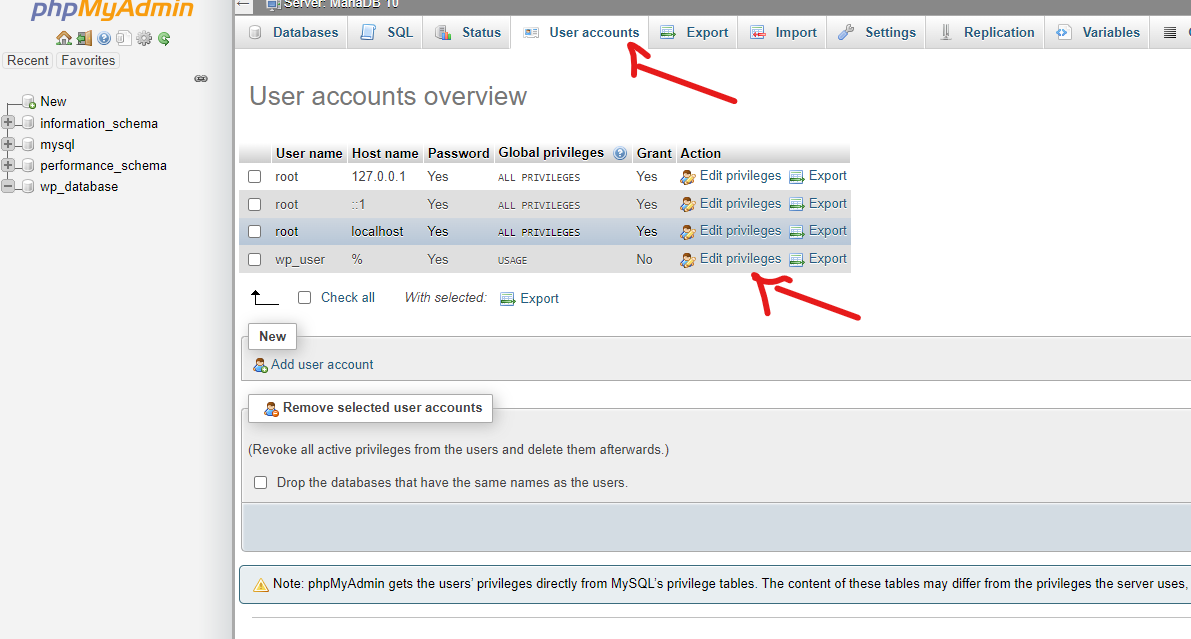
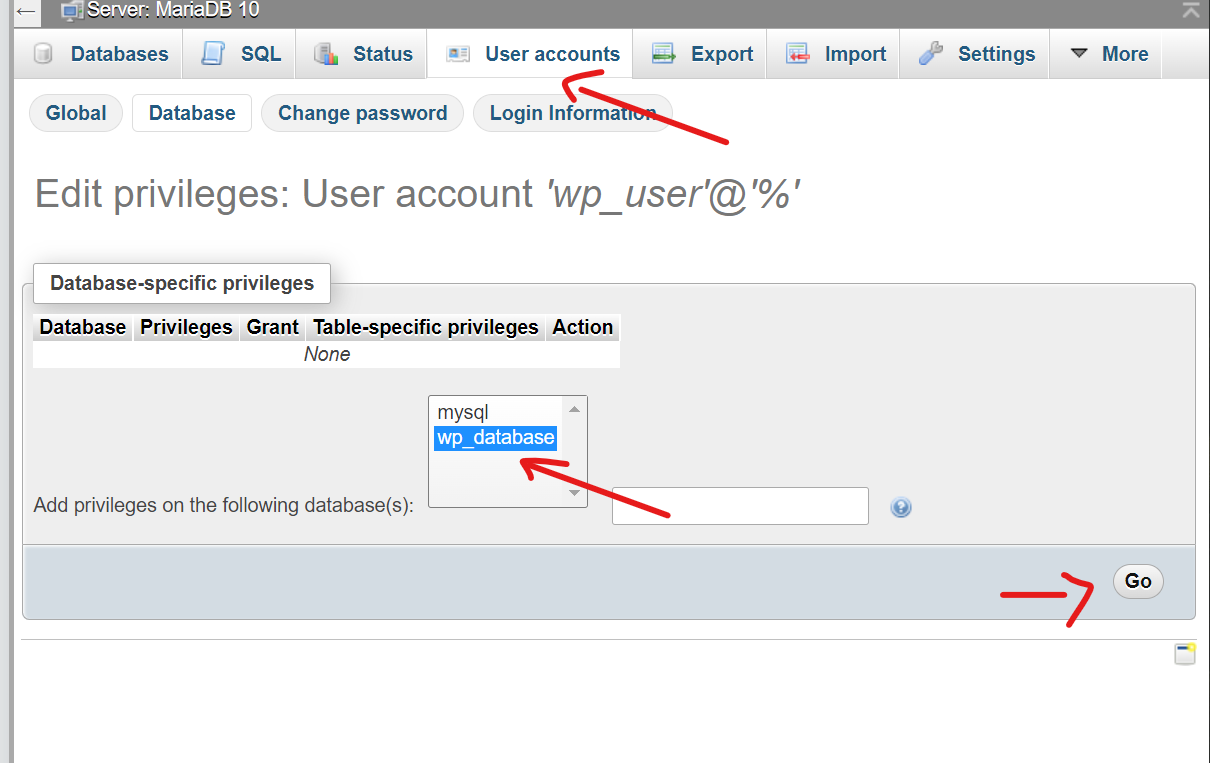
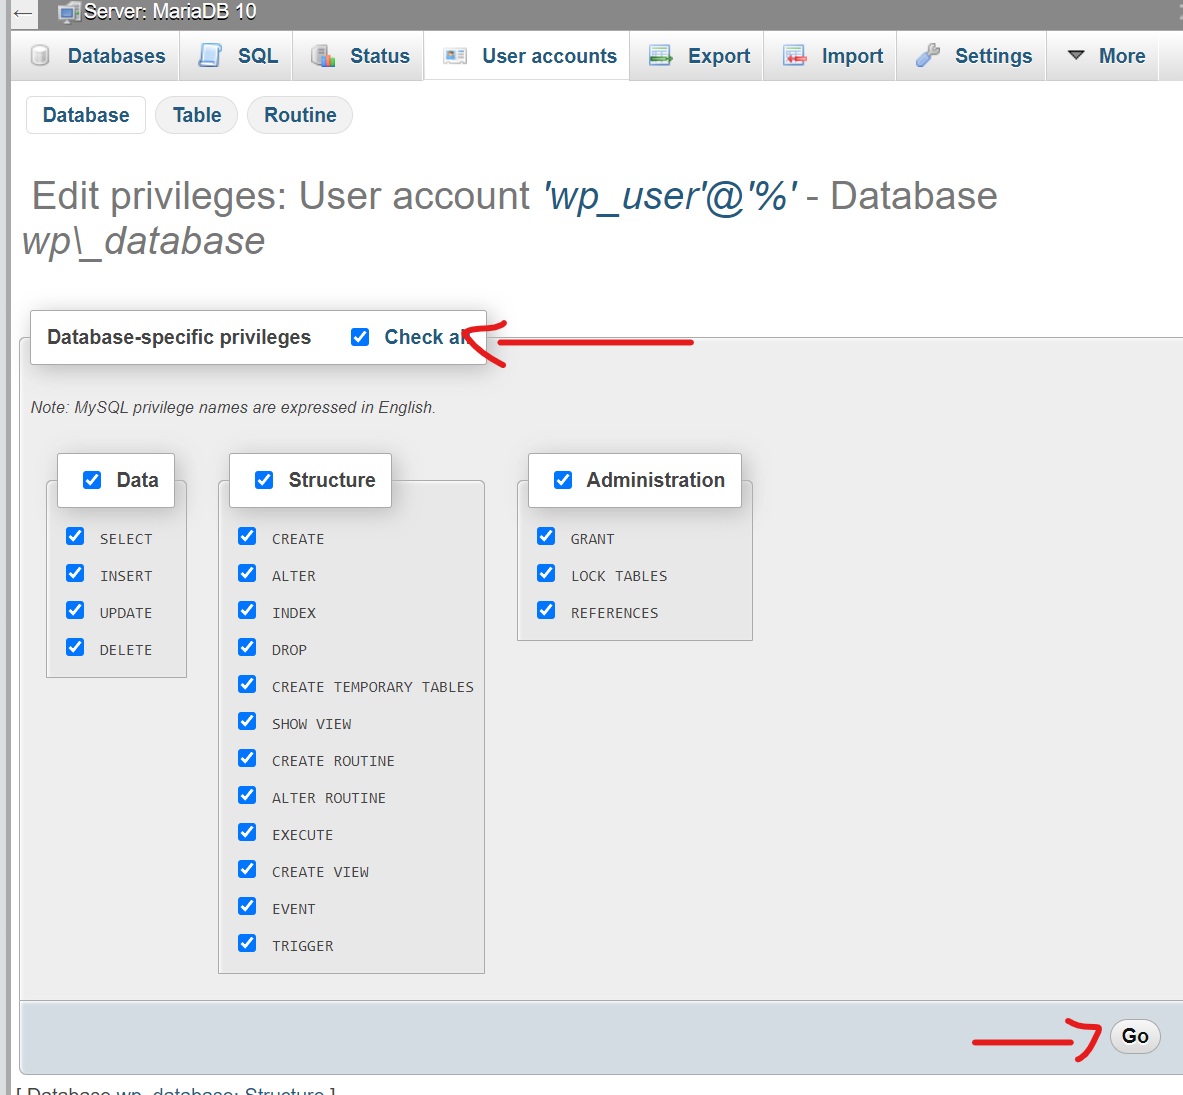
Edit the privileges of user “wp_user”
Under the tab “Database” chosse “data_base” and click Go
Tick the button “Check all” and click Go
You should have now a database with the name “wp_database” and a user “wp_user” who has full control to that database.
After logging in you see all your databases
3. Create PHP 8.0 profile for WorPress in Web Station
Open Webstation
Under Script Language Settings click on “Create”
In the Settings menu of the pop up window
set a Profile name and a Description
set PHP version: PHP 8.0 and
enable PHP cache
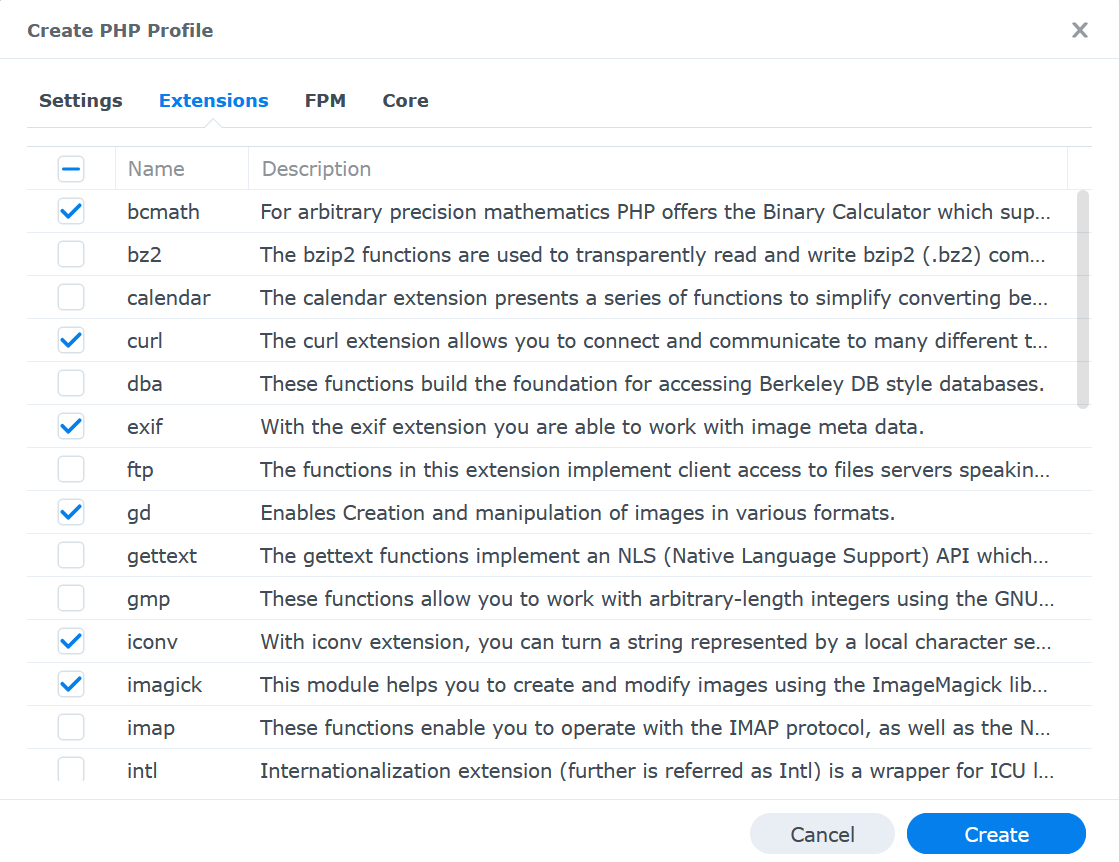
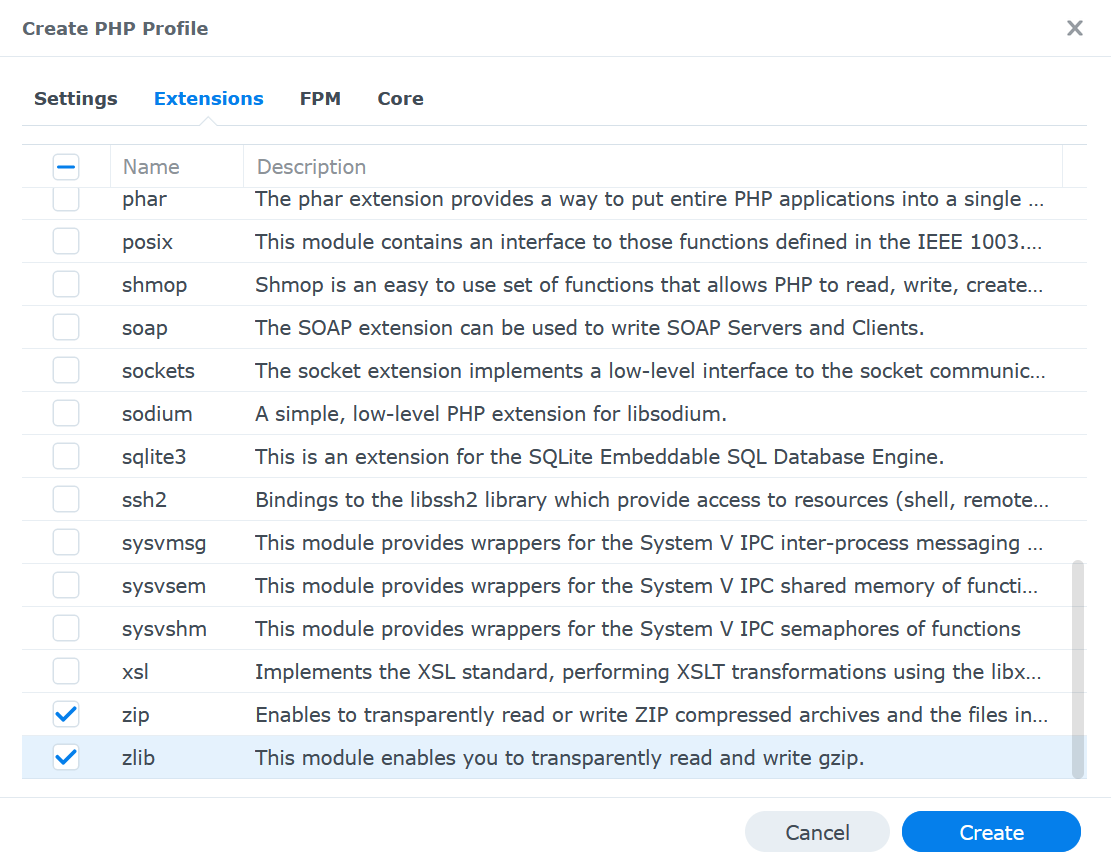
In the Extensions tab select the following extensions:
bcmath
curl
exif
ftp (optional)
gd
iconv
imagick
intl
mysqli
openssl
zip
zlip
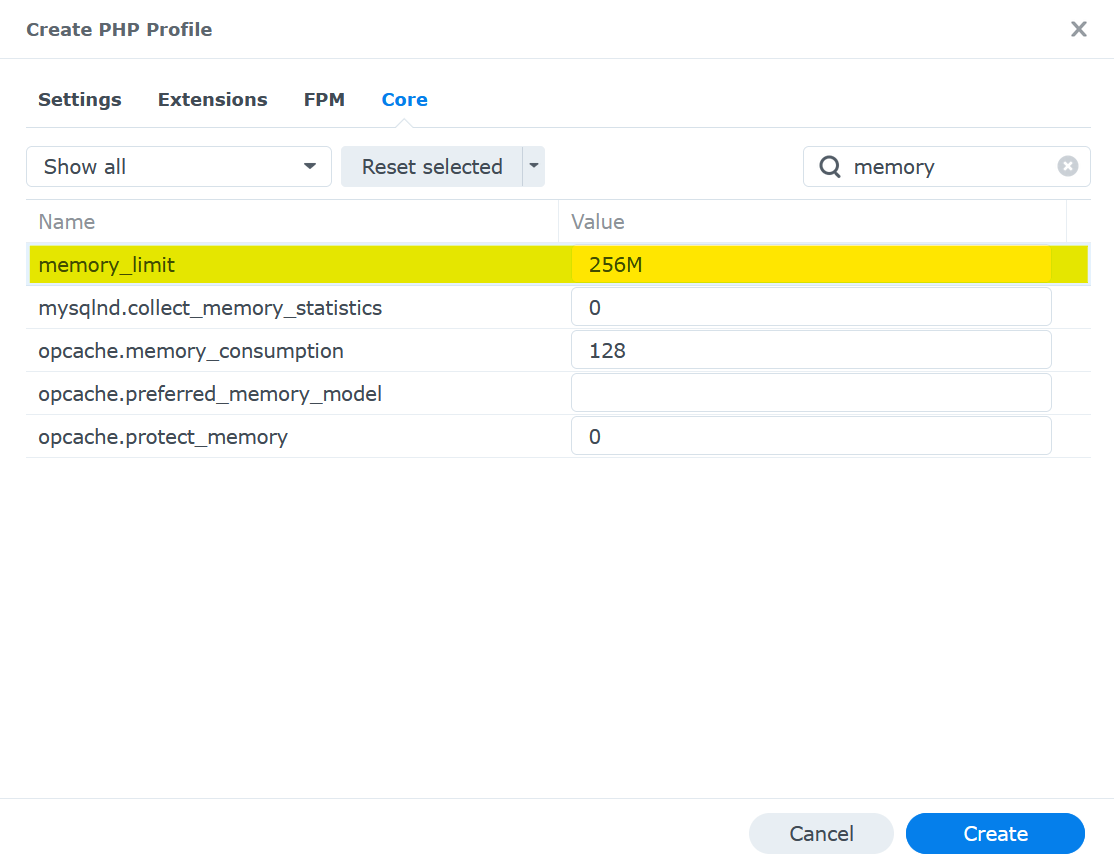
In the Core tab set these values:
max_execution time: 600
max_input_vars: 3000
post_max_size: 1024M
upload_max_filesize: 1024M
memory_limit: 256M
Click “Create” for finishing the profile.
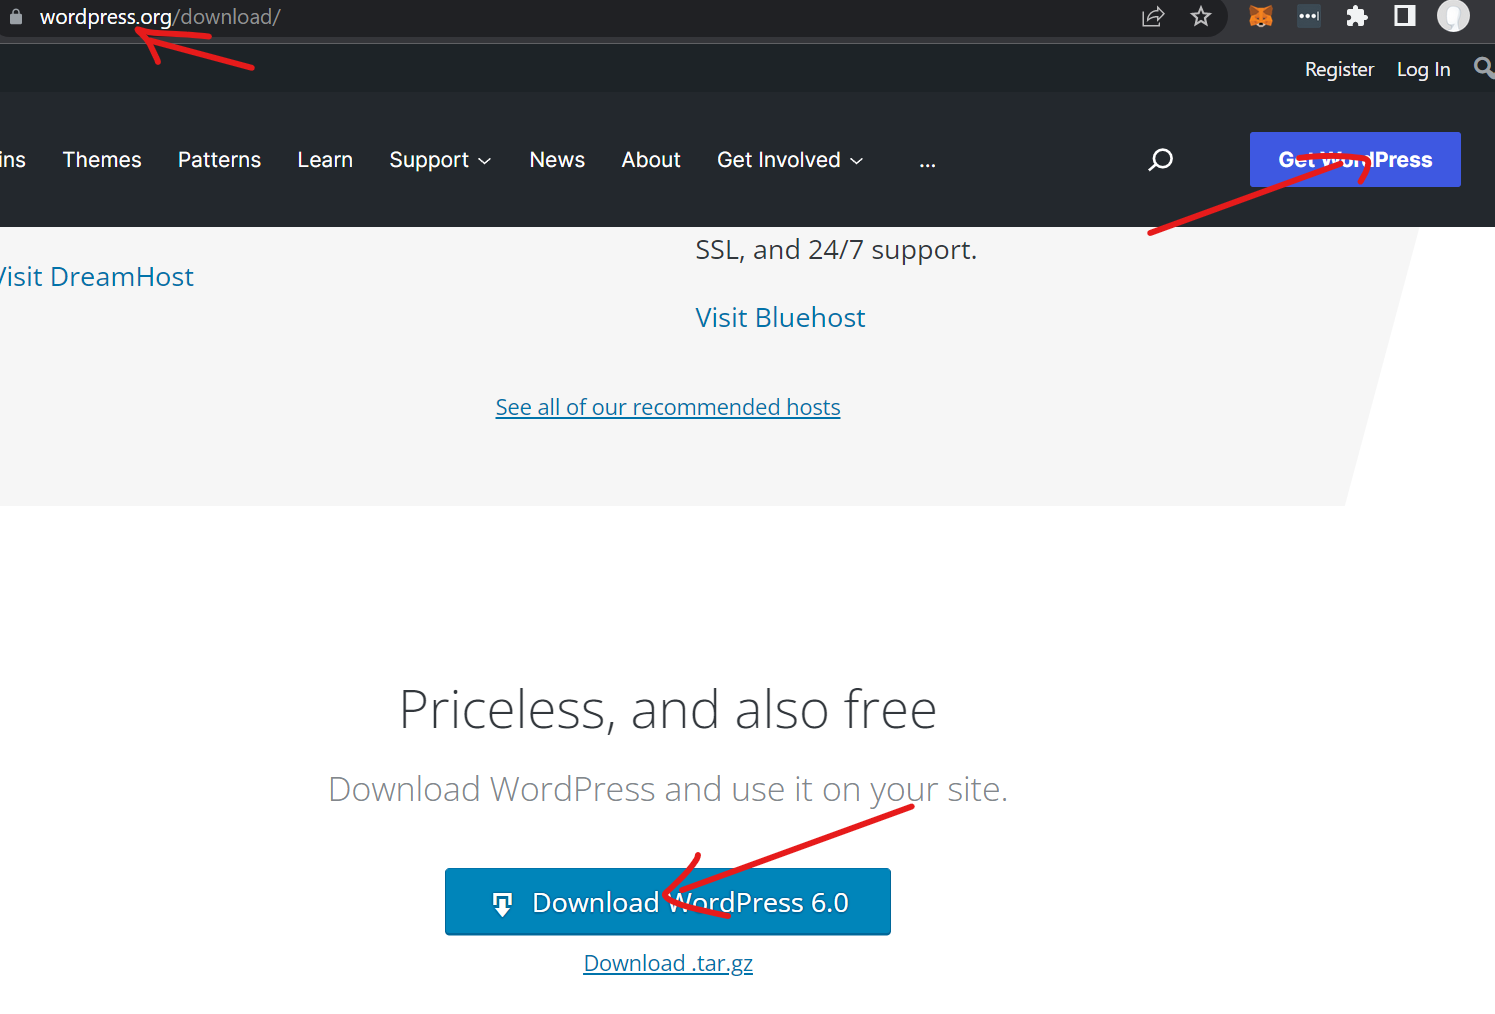
4. Download WordPress
Download WordPress and save the “wordpress-6.0.zip”
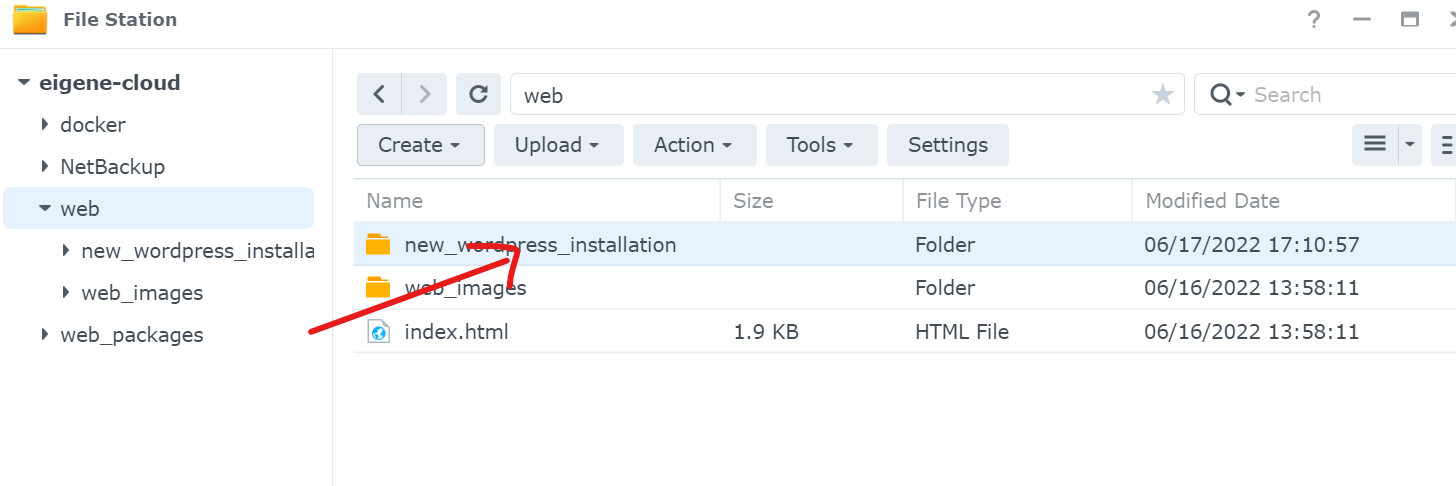
Create a folder “new_wordpress_installation” in the web folder of Web Station
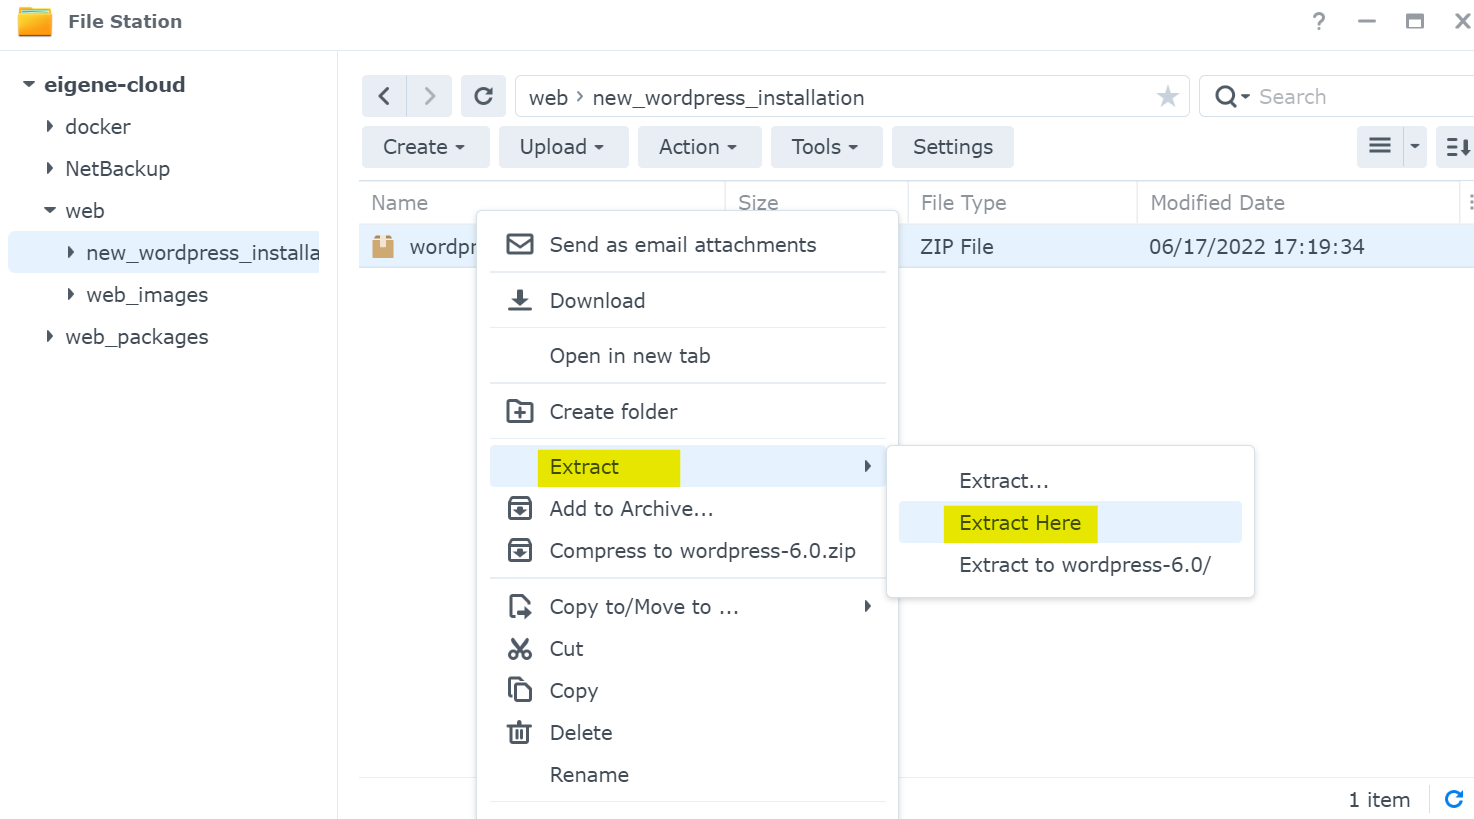
Unzip wordpress-6.0.zip into this folder
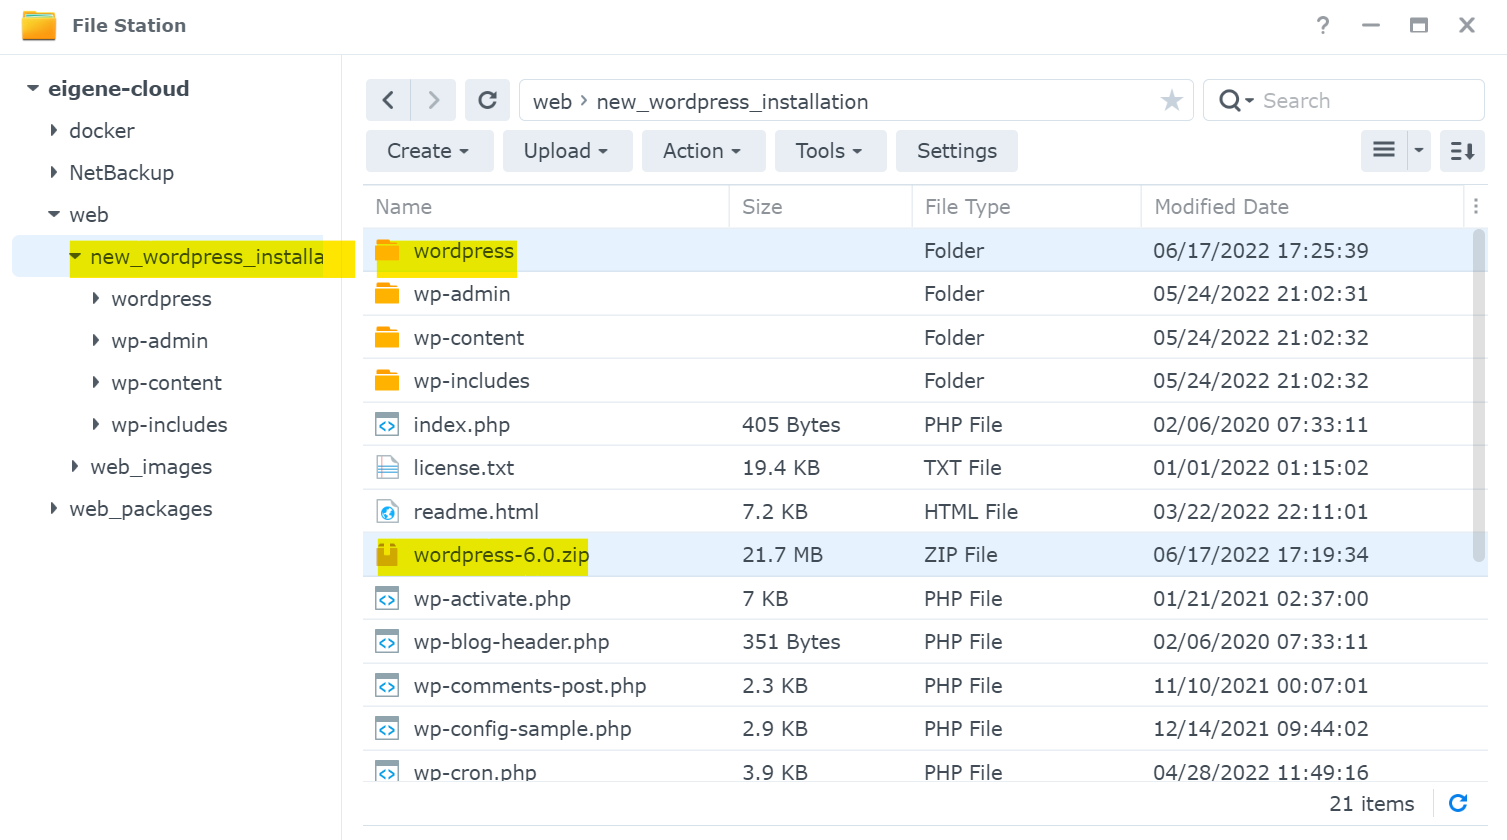
After putting every file and folder from the unzipped “wordpress-6.0.zip” e.g “wordpress” in your “new_wordpress_installation” folder , you can delete the empty “wordpress” and the downloaded “wordpress-6.0.zip” folder
5. Install WordPress
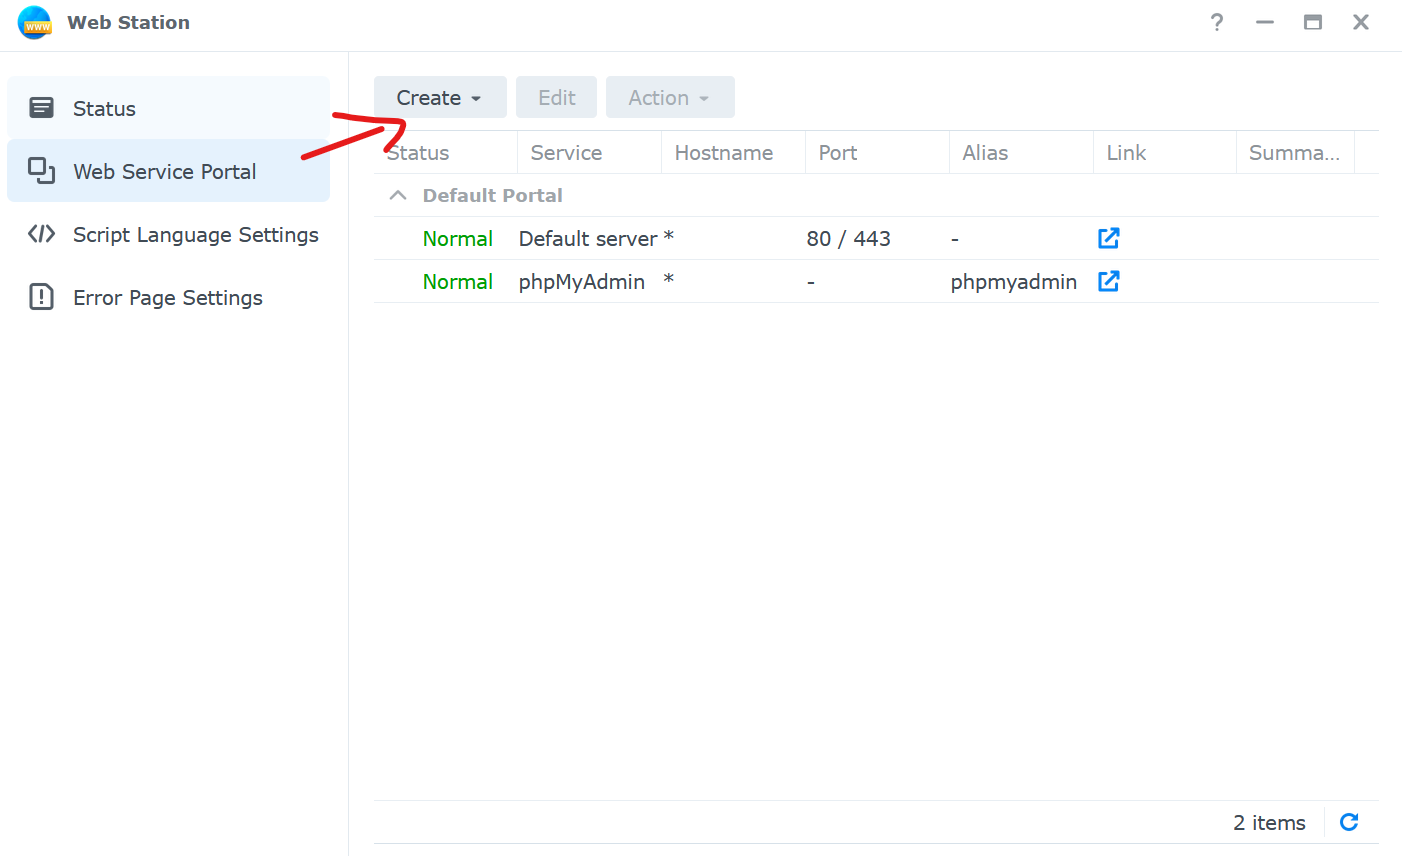
Open Web Station
Goto Web Service Portal
Click Create
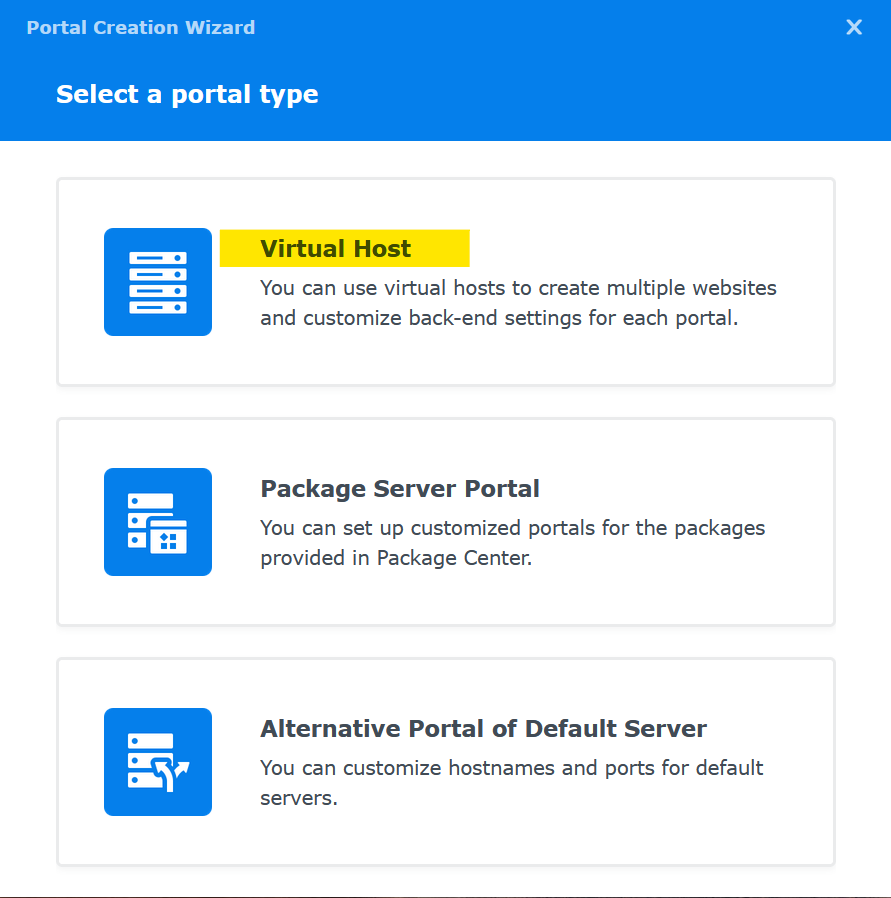
Choose Virtual Host
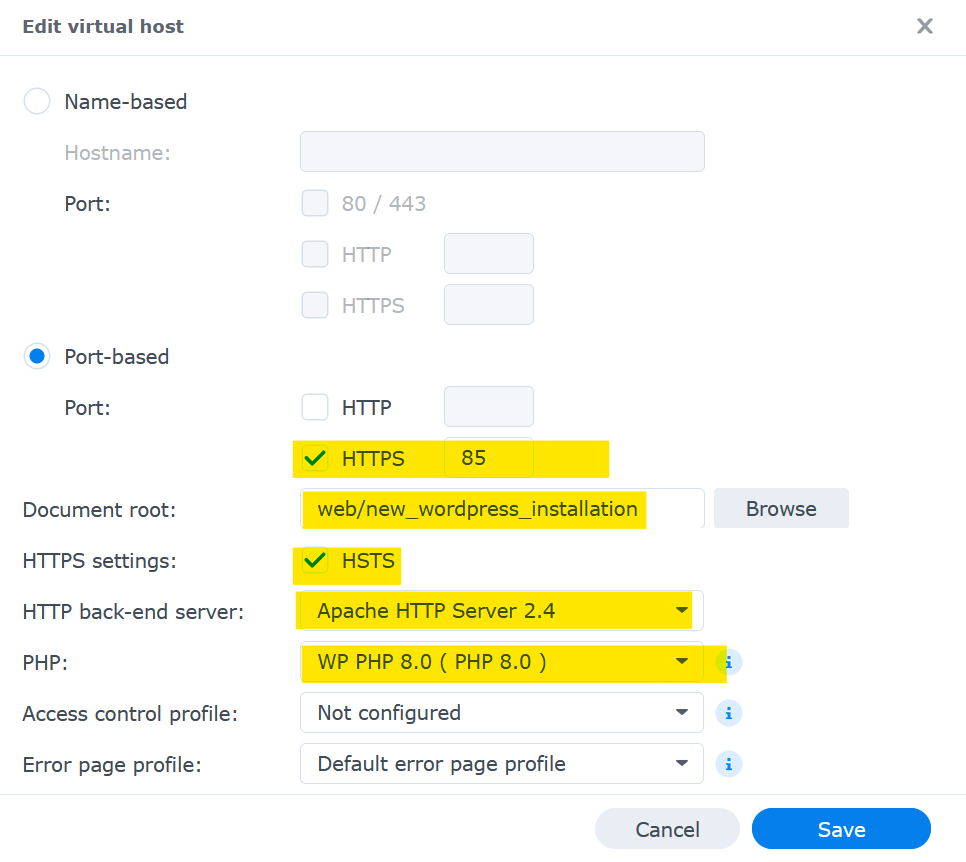
Select Port-based virtual host for testing (or Name-based if you already have a domain pointing to your synology’s public ip)
Tick HTTPS and set port 85
Set “web/new_wordpress_installation” under document root
Set Apache HTTP 2.4 under HTTP back-end server
Set WP PHP 8.0 (PHP 8.0) under PHP
Click Save
Connect MariaDB to WordPress
Open FileStation and goto the “new_wordpress_installation” folder
Copy and rename the file “wp-config-sample.php” to “wp-config.php”
Open wp_config.php (you still have to have wp-config-sample.php) and change the following lines:
Add the end of wp-config.php add the following line:
define( ‘FS_METHOD’, ‘direct’ );
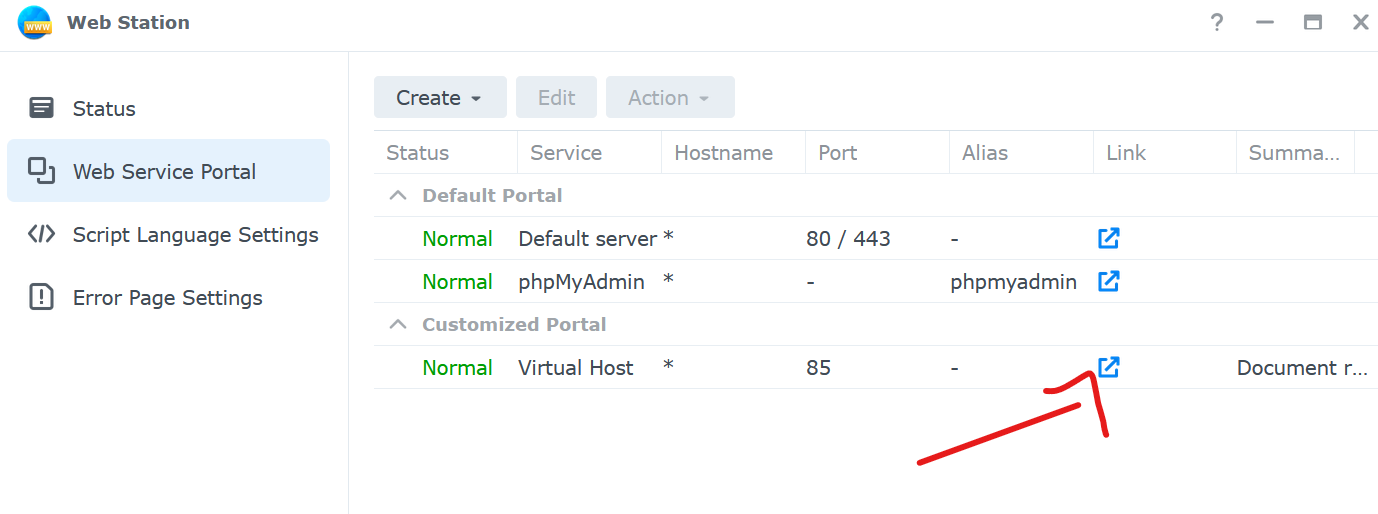
Go again to your-synolog-ip:85 (port 85), now you should be connected to your created wordpress database
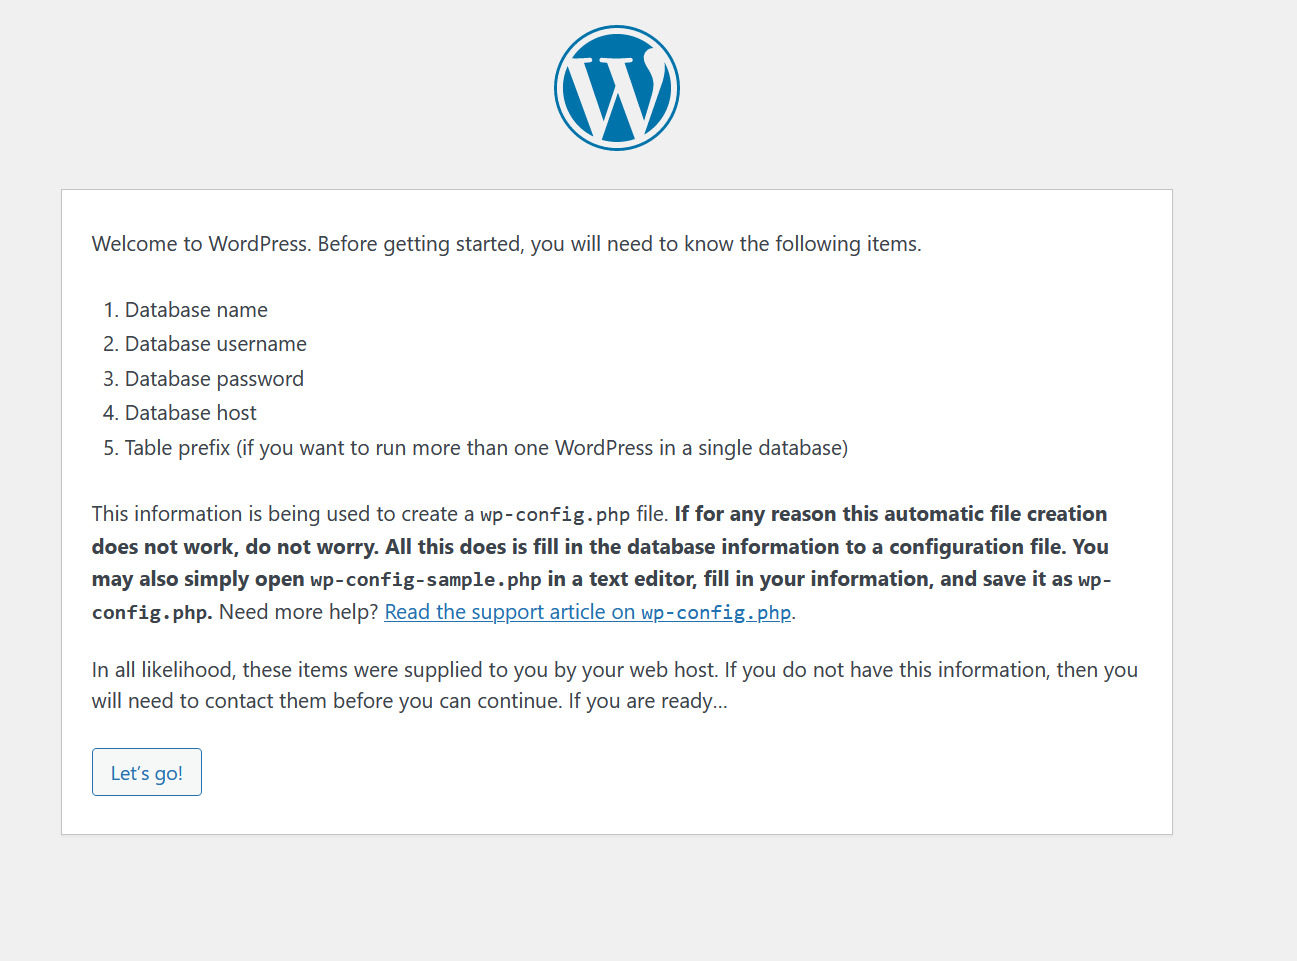
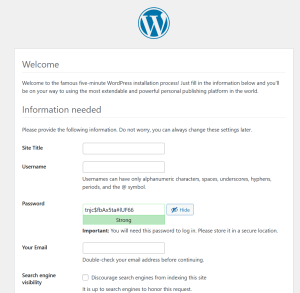
Finally you should be presented with the normal WordPress installation screen. After you fill in your WordPresss username and password and the other data, you have another running WorPress installtion. Happy blogging :).
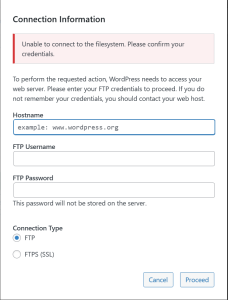
6. Resolve error: "Unable to connect to filesystem..."
If you get the error “Unable to connect to filesystem. Please confirm your credentials.”, you have to add “define( ‘FS_METHOD’, ‘direct’ );” to your wp-config.php file.
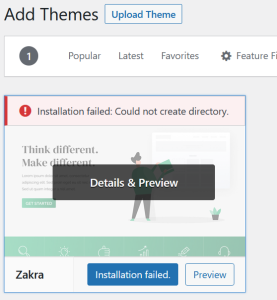
7. Resolve error: "Could not create directory..."
If you get the error “Installation failed: Could not create directory.”, you have to set write permission for http user.
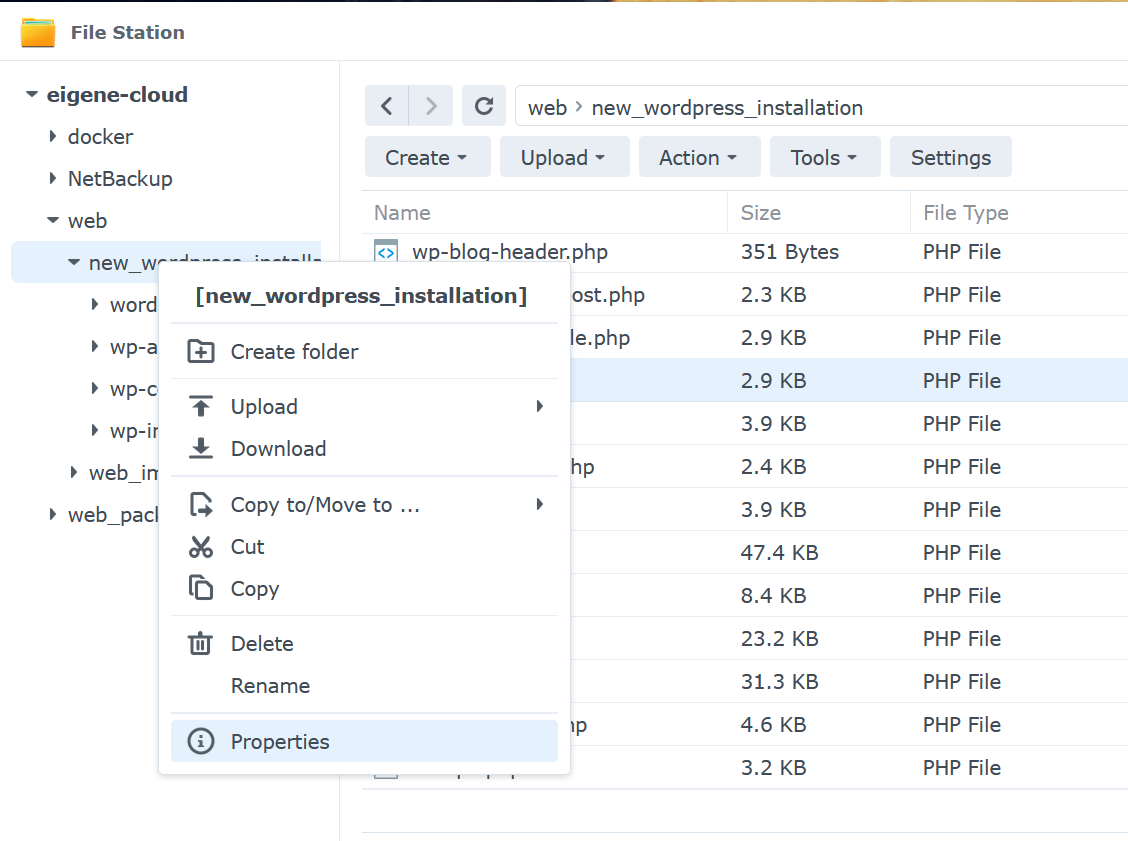
Open File Station:
Right click on the “new_wordpress_installation” folderand click on properties.
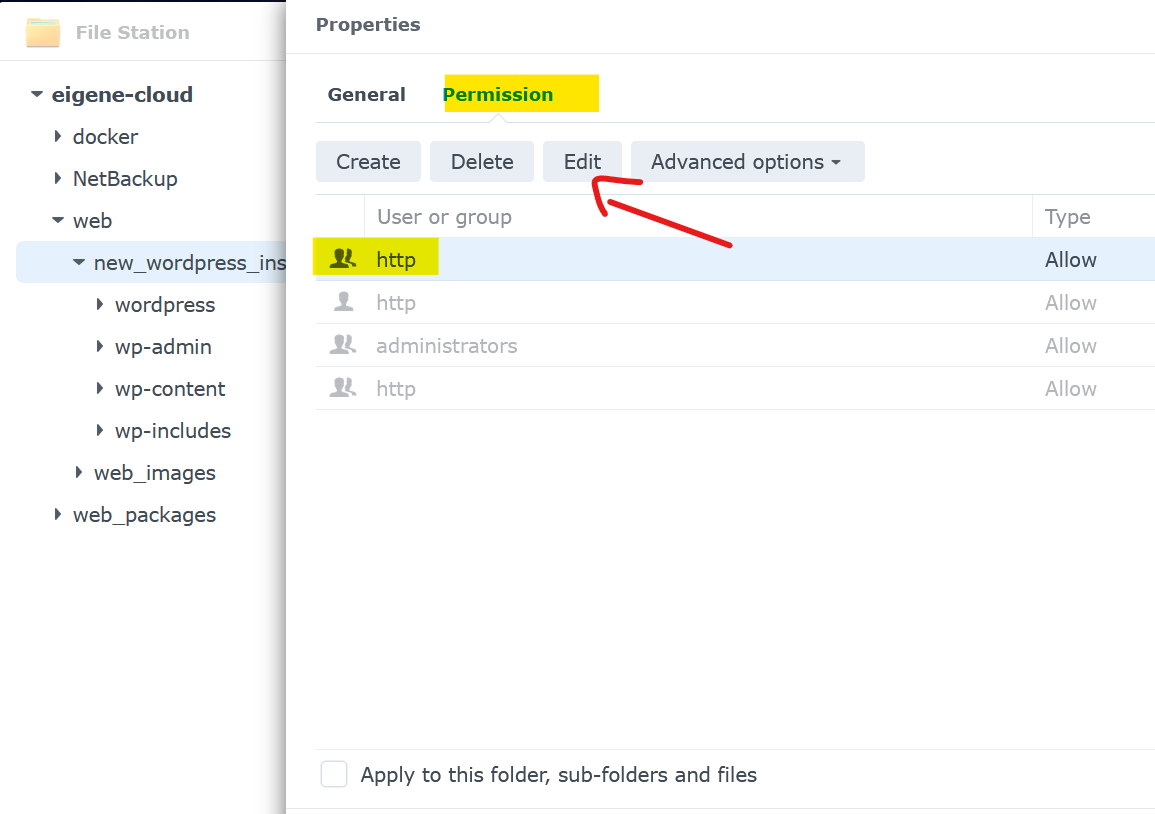
Go to the permission tab and edit the user “http“.
Tick the box “Write” to give the http user all wirte permissions.
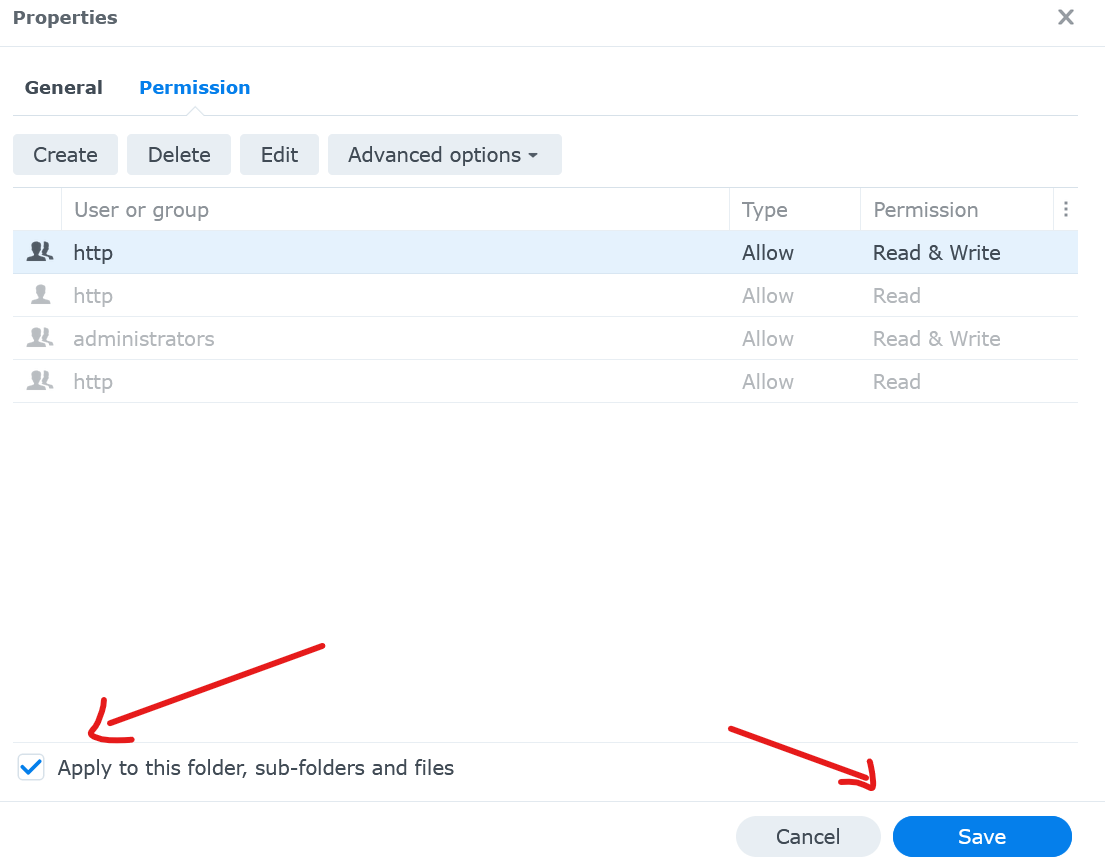
After clicking done tick the box “Apply to this folder, sub-folders and files” and then click save.
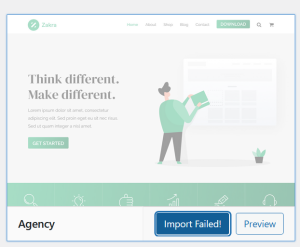
8. Resolve error: "Import failed!"
If you get the error “Import failed!”, it is most likely because either nginx and/or apache are timing out. When you scroll up, you can also see “Installation failed: Gateway Timeout Try this solution!“. It’s a timeout error.
For solving the timeout error you have to log into your synology via ssh:
Under control panel enable ssh.
With PowerShell (Windows Terminal etc.) log into your synology with the command “ssh username@ip-of-your-synology“.
Accept the “ECDSA key fingerprint” and log in with you synology nas password.
Solve nginx timeout error (you can do this also in a file browser, see link):
Use the following command“cd /volume1/@appstore/WebStation/misc” to change directories.
Use the following command “sudo cp VirtualHost-nginx.mustache VirtualHost-nginx.mustache.save” to make a copy of the nginx.mustache file.
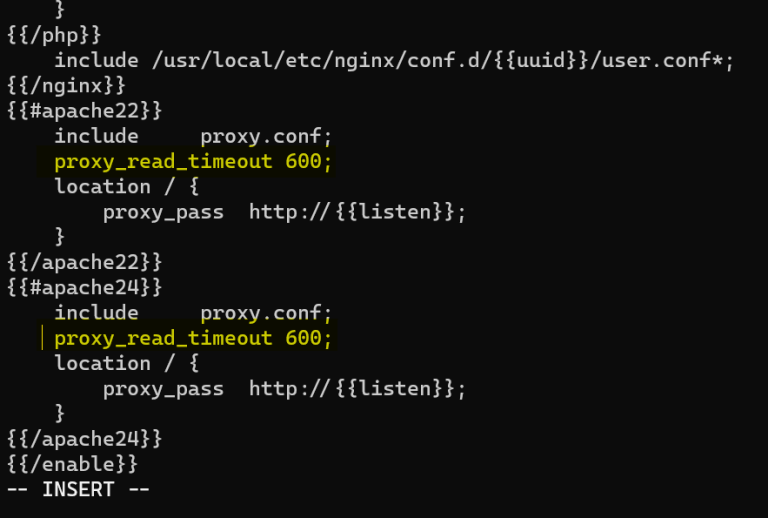
Use vi to change the nginx.mustache file with following command “sudo vi VirtualHost-nginx.mustache“. Add the two following higlighted lines “proxy_read_timeout 600s;” – see picture below (vi editor is a little bit ugly to use, u have to press i for insert and ESC, to exit insert mode. If you changed the following lines, you can exit vi with “:wq“ + Enter).
Solve apache timeout error (you cannot do this in filebrowser):
Use the following command“cd /usr/local/etc/apache24/conf” to change directories.
Use the following command “sudo cp httpd24.conf httpd24.conf.save” to make a copy of the httpd24.conf file.
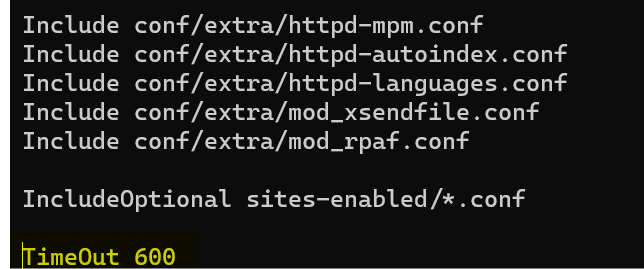
Use vi to change the httpd24.conf file with following command “sudo vi httpd24.conf“. Add the two following higlighted line “TimeOut 600” – see picture below- to the end of httpd24.conf.
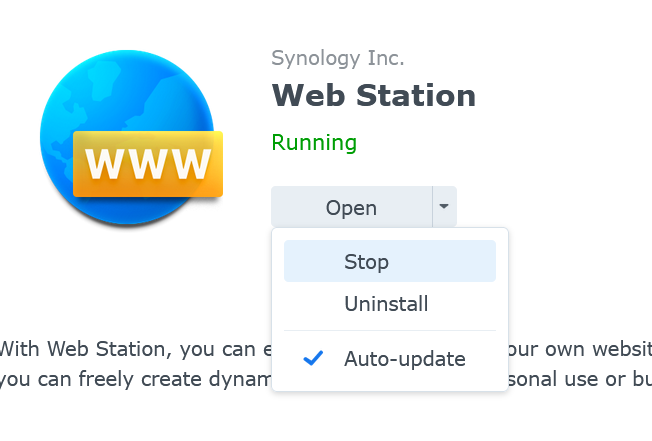
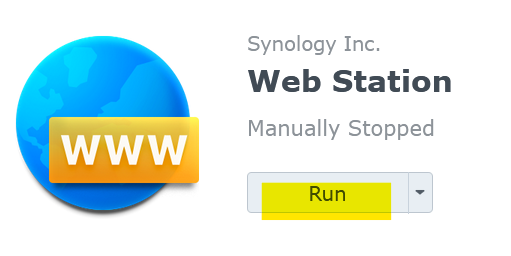
Restart Web Station (you also have to start apache again and after a lot of hard work, finally no more errors :)).
How to create several WorPress installations for Synology’s Web Station